Laying advice
Floor laying – Advice for achieving a top quality result
Successful laying depends partly on the technical quality and appearance of the material used, but also on various other elements (the foundation, bonding layer, expansion joint, etc.) which all help to produce a proper flooring system. Carrying out the laying operation correctly is therefore vital if you want to ensure a really good result. The laying should involve the use of special types of adhesive. For information about the best form of adhesive and its means of application, refer to the instructions provided by the adhesive manufacturers themselves. New production techniques tend to simulate the randomness of nature: variations in colour therefore provide an added element which a skilled floor-layer can exploit, enabling him to achieve some special and unique effects. To get the best results from the material you are using, we advise you to follow these important steps when laying the floor: Lay out a few tiles on the floor (to cover at least 3 square metres) to get an idea of the overall effect. Use tiles from several boxes.
When working with polished surfaces in particular, never mark the upper surface of the tile with a pencil or felt-tip pen before cutting.
Calculate the gap between tiles on the basis of the type of material used.
When working on site, be careful to protect the surface already laid (particularly in the case of a lapped finish) by covering it with cardboard sheets or other suitable material.
Wait 48-72 hours before putting any weight on the flooring.
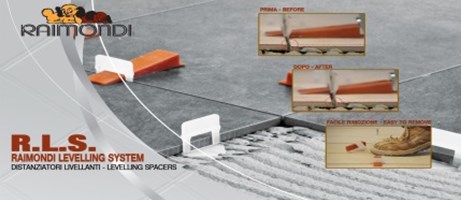
In addition, to achieve a professional effect, we advise the use of levelling spacers.
General characteristics
The self-levelling system has revolutionised the world of floor-laying, enabling one to lay a perfect floor simply and rapidly by eliminating any differences in height between the tiles.
It is ideal for both large-sized and ultra-thin (3/6 mm) tiles.
It consists of 3 elements: base, wedge, pliers.
The bases are available in various versions grouped into two main types: bases for tiles between 3 and 12 mm thick, and bases for tiles between 12 and 20 mmm thick. The bases for the first type are further divided into four different models: two for achieving a grout joint of 1.5 mm, one for a 3-mm joint and one for a 4-mm joint. Of special note are the new “3D” bases, ideal for use with any type of design lay-out. These can be positioned either at the intersection between the tiles (either in a “+” shape or a “T” shape) or on the side of the tiles.
There is a single wedge for all the bases, which can be used many times over. The adjustable pliers are available in versions for floor-laying and for wall-tiling, and are designed to help you insert the wedges into the bases quickly and efficiently, also enabling you to exert just the right pressure on the tile. There is only one form of pliers, regardless of the sort of base you are using and the thickness of the tile.
The R.L.S. levelling system is also fast and simple to remove: you just need to give the bases a sharp kick to remove the unnecessary parts from the finished floor – no special tool is required.
Conditions of use
Positioning of the base:
1. After spreading out the adhesive, insert the bases under the tile in relation to the four sides, or, if you are using the “3D” bases, in relation to the intersection between the tiles and/or on the side of the tiles, depending on your design lay-out.
2. Use one or more bases per tile, depending on the tile format.
3. Position the tile and tap it with a rubber mallet.
Inserting the wedge:
1. Insert the wedge into the slot in the base, taking care not to exceed breaking-point.
2. To assist insertion of the wedge, we advise the use of the traction-adjustable pliers.
Removal of the bases:
When the adhesive is set firmly, the exposed part of the base can be removed by knocking it sharply, along the line of the joint, using your shoe or a rubber mallet.
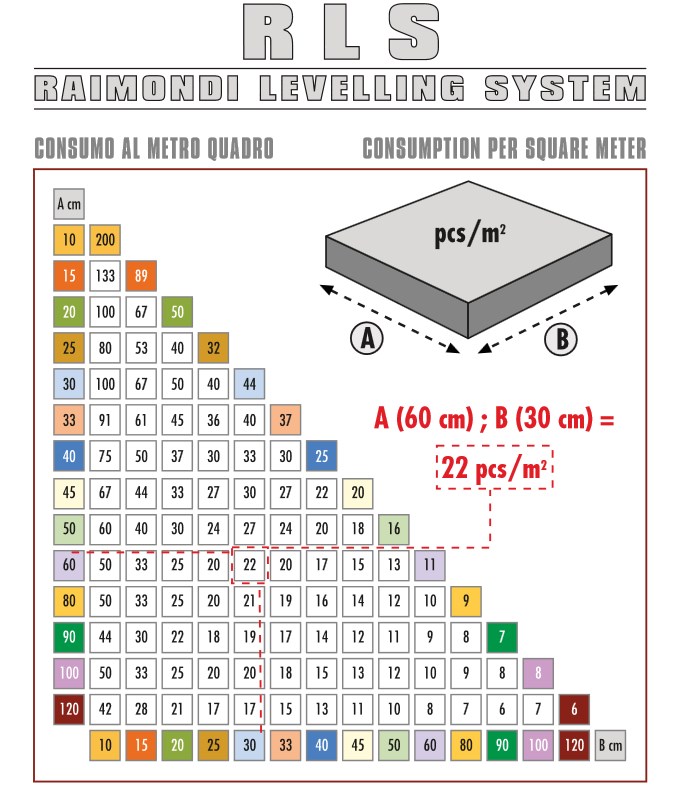
There is also a tool available online for CONSUMPTION CALCULATION
GO TO THE SITE